Contents
Introduction
What is it?
CmdTwain is a free command line image scanner program.
Its purpose is to allow you to integrate scanned documents into programs that record information such as tax receipts, resumes, photo albums, correspondence and so on.
Installation
Installation is simple - just double-click the downloaded installer and follow the steps.
NOTE: Windows will warn you that the publisher is unknown. This is because Windows doesn't have a certificate for GssEziSoft built in. But the publisher isn't unknown to you because you just downloaded the program and probably did so from this site or another reputable one.
If you want, you can install the GssEziSoft Certificate and Windows will check that this and subsequent downloads and installs are genuine.
Use
Introduction
Scanning a document involves choosing some scanner settings, picking an output format and deciding where to save the scan.
The simplest way to scan a document continues to be:
C:\> [path\]CmdTwain file.jpgIf you chose "Include easier command prompt access" during the installation, you can leave out the "[path]" bit and run the command from any directory on your computer.
This will scan a page from your document scanner and save the result in "file.jpg". It will be an A4-sized color scan at 200 dots per inch.
If you have multiple pages in your scanner, you will also get "file-00002.jpg", "file-00003.jpg" and so on. These are page 2, page 3, etc of your document.
Scanner Settings
Scanner settings are things like the size of the scan, the resolution and color (or not). They can also include whether to use the document feeder, how much brightness to use when scanning, whether to only scan part of a page and so on. Different scanners have different options and which ones you choose will depend on your needs. Fortunately many settings are common across scanners. These are:
Paper. A number of standard paper sizes are built in to the document scanner standard. These are: A4, LETTER, LEGAL, A3, A5, A6, B3, B4, B5, B6, C4, C5 and C6. There is a good chance that your scanner will recognize one of these paper sizes. That said, I have also seen cases where scanners ignore paper size and just scan based on the scanner size. Most scanner software will allow you to pick a paper size and continue anyway if the scanner chooses something else instead. CmdTwain works this way. You can ask and if the scanner supports the requested size you'll get it. But in some cases you won't. You may be able to use a different scanner that does support that paper size but you also have other options such as Width and Height.
Width and Height. Many document scanners allow you to pick a custom size. The size is usually measured in inches or centimeters and you can tell the scanner which one you mean. It is usually easier to pick a paper size by its name but, if you have to use width and height instead, here are the sizes:
| Name | Unit | Width | Height |
|---|---|---|---|
| A4 | centimeters | 21.0 | 29.7 |
| LETTER | inches | 8.5 | 11.0 |
| LEGAL | inches | 8.5 | 14.0 |
| A3 | centimeters | 29.7 | 42.0 |
| A5 | centimeters | 14.8 | 21.0 |
| A6 | centimeters | 10.5 | 14.8 |
| B3 | centimeters | 35.3 | 50.0 |
| B4 | centimeters | 25.0 | 35.3 |
| B5 | centimeters | 17.6 | 25.0 |
| B6 | centimeters | 12.5 | 17.6 |
| C4 | centimeters | 22.9 | 32.4 |
| C5 | centimeters | 16.2 | 22.9 |
| C6 | centimeters | 11.4 | 16.2 |
If all else fails, just take the full size image that the scanner provides and keep it as is or crop it with an image editing program. It seems wrong to save a file with a lot of empty space (because the scan size is too big) but output formats such as JPEG compress the file anyway. This means the file size is about the same despite the empty space. (so don't be too concerned if you have to.)
Dots Per Inch. A scanner's resolution is measured in "dots per inch". Common values are 200, 300 and 600. The more dots you scan per inch, the bigger your file will be. You get more pixels in the image and those take up more file space. If a small file size is important for you then choose a low resolution like 200 (or less). If quality is more important then you'll need a higher resolution like 300. If you will be projecting a powerpoint presentation which includes scanned images, it is a good idea to check how they look when projected. Scanners are only capable of certain resolutions. This means they may ignore your preference. Usually though, they'll pick the closest they have to what you asked for.
Color. Most scanners can produce color, black and white or gray scale images. Some, such as medical imaging (eg X-ray machines) can only produce gray scale ones. Again, it depends on your scanner. With CmdTwain you can ask for color, black and white, or gray.
Output Format
The "native mode" for most scanners is a bitmap. This is a rectangular array of pixels. There are so many across (width) and so many down (height). How many you get depends on your paper size and your resolution. A paper size of LETTER is 8.5" by 11.0". If you scan at 200 dots per inch, you'll get a width of 1700 pixels (=8.5 x 200 dots) and a height of 2200 pixels. In theory, if you use black and white each pixel is a 1 or a 0 and takes up one bit. If you use "gray" each pixel can be a value between 0 and 255 which takes up 8 bits. If you use color then values between 0 and 255 are stored for each of red, green and blue; so each pixel takes up 24 bits.
There are 8 bits per byte so you can expect a 200 dots per inch ("dpi") scan to take up:
1700 x 2200 x  1 / 8 =  467 KB (black and white),
1700 x 2200 x  8 / 8 =  3.7 MB (gray), or
1700 x 2200 x 24 / 8 = 11.2 MB (color).
These are fairly large files so most people choose an output format that compresses the image to a smaller size.
(If you're using centimeter (cm) sizes, 1 cm = 2.54 inches so dots = cm / 2.54 x dpi)
The JPEG standard compresses image files. It does this by looking at parts of the image and, where there are similar regions, records that the pixels in that region are (mostly) this color. The process is called "lossy" because you can't recreate an exact copy of what was in the original image. That said, it does work very well with real world images (such as photos) as the eye often blends things anyway.
With JPEG format you do have some control over how lossy the process is. This allows you to choose a combination that works well for you.
The JPEG quality values are: 25 (low quality, lots of compression, small file size), 50 (medium quality, less compression, not as small a file size), 75 (reasonable quality, reasonable compression, reasonable file size) and 100 (best quality, minimum compression, bigger file size). It should be noted that JPEG files (even with a quality of 100) will always be smaller than uncompressed bitmap files.
You can also use PDF as an output format. This will scan the images as bitmaps, convert them to JPEGs (with a quality setting of 75) and then save the result in an A4-sized PDF document. PDF2 and PDF3 do the same but with LETTER-sized or LEGAL-sized PDFs.
If you scanned a number of pages together, all of the pages will be placed, in order, in a single PDF file.
Where to Save the Scan
This is pretty straight forward. What do you want to call the scan and what folder do you want to keep it in? Common answers are:
c:\Users\(your name)\Documents\scan.jpgThis will save it in your "Documents" folder with the name "scan.jpg"
c:\Users\(your name)\Desktop\doc.bmpThis will save it on your Desktop with the name "doc.bmp"
It is best to use a file name that ends in ".bmp" if you choose bitmap for the Output Format, ".jpg" or ".jpeg" if you choose one of the JPEG Output Formats, or ".pdf" if you choose one of the PDF outputs. CmdTwain will work regardless of what you choose; but other programs sometimes require files with those endings.
Using CmdTwain
The usage message says:
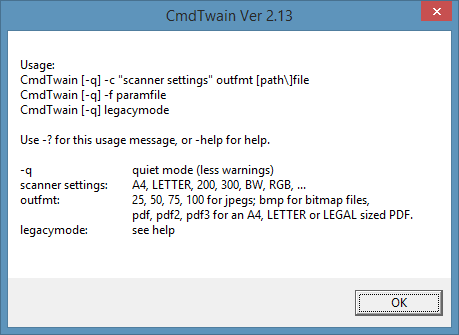
To get the easy ones out of the way first:
-? displays the usage message seen above.
-help displays this help file.
-ver will give the build date.
The -q option has been added in ver 2.13. It works with the usual options to quieten down CmdTwain. CmdTwain normally complains if something goes wrong during the scanning process. It pops up error messages like "Couldn't open TWAIN device. Check cables" and "Couldn't scan image". The error messages were intended to be helpful when setting up CmdTwain but some scanners error-out at the end of a scan. This can be intrusive if it happens all the time. Some people have reported success after updating the scanner driver but, in case that's not you, you can turn off the messages. Just add -q on your command line.
There are a number of different ways that you can run CmdTwain. Please feel free to pick whichever way best suits your needs.
The different ways are: command line mode, parameter file mode, and legacy mode. These are explained below.
CmdTwain -c Command Line Mode
There are three parameters after the "-c" part of the command. These are:
scanner settings,
the output format, and
where the scan ends up (path and file).
Scanner Settings. You can include none or more scanner settings here. If you use none, make sure you include the two quote characters ("") so that the program knows this parameter IS present and that it's empty. If you do so, CmdTwain will use default settings. These are "PAPER A4 DPI 200 RGB" and they give you an A4 sized scan at 200 dots per inch in color.
If you want to change any of the defaults, just type in the desired alternative(s) into the scanner settings parameter. If you include more than one word in the settings you'll need to include quotes around the combination so that the program knows all of these make up the first parameter.
Example 1 (use the defaults):
C:\> CmdTwain -c "" ...Example 2 (mostly defaults but use black and white):
C:\> CmdTwain -c BW ...Example 3 (mostly defaults but use 300 dots per inch):
C:\> CmdTwain -c "DPI 300" ...Example 4 (LETTER sized scan, 300 dots per inch, in gray):
C:\> CmdTwain -c "PAPER LETTER DPI 300 GRAY" ...You can also use "IN" (for inches) or "CM" (for centimetres) and then "WH w.w h.h" (to specify a custom width and height; or "IN" or "CM" and then "XYWH x.x y.y w.w h.h" (to scan a custom size from an indent across (by x.x) and down (by y.y).
Scanner Settings - Shortcuts. Command Line Mode also understands some shortcuts. These are:
| This | Instead of |
|---|---|
| "A4" | "PAPER A4" |
| "LETTER" | "PAPER LETTER" |
| "LEGAL" | "PAPER LEGAL" |
| "A3" | "PAPER A3" |
| "200" | "DPI 200" |
| "300" | "DPI 300" |
| "COLOR" | "RGB" |
Scanner Settings - Additional Functions. There are a number of additional scanner settings that you can use in Command Line Mode. Your scanner may not support them but the additional settings you can request are:
| Setting | Details |
|---|---|
| "BR n.n" | Brightness (-1000..1000). 0 is normal. |
| "CO n.n" | Contrast (-1000..1000). 0 is normal. |
| "ADF n" | Automatic Document Feeder. Use 1 for "on" or 0 for "off". |
| "DPX n" | Duplex. Use 1 for "on" or 0 for "off". |
| "AF n" | Autofeed. Use 1 for "on" or 0 for "off". |
| "AS n" | Autoscan. Use 1 for "on" or 0 for "off". |
| "AUTOBR n" | Automatically adjust brightness. Use 1 for "on" or 0 for "off". |
outfmt. You can use "25", "50", "75" or "100" for this in order to get JPEG format files with these levels of quality. You don't need to include the quote marks (""). If you use "bmp" you'll get a bitmap format file.
PDF files can be created by using PDF, PDF2 or PDF3. These do A4, LETTER or LEGAL sized PDFs. You should also include a matching A4, LETTER or LEGAL in the scanner settings (unless you want some unusual cropping, padding or similar effects).
There is another outfmt that is also supported. This is "75.8". A user, a while ago, asked for this. It allows producing a JPEG format file, with a quality setting of 75, but it outputs the information with 8 bits per pixel - even if you're using color (RGB). Normally you get 24 bit colors. In this format you are limited to 256 different colors/shades. It makes for a smaller file and the colors don't look quite as natural. More importantly for him, it was able to be processed by some very old software (that predated 24 bit colors) which he was required to use. This outfmt uses the Mozilla JPEG library. See the CmdTwain install directory for a copy of the license for this.
[path]file. This is where you say where to put the result and what to call it. You'll find it easier to use other programs if "file" ends with ".jpg" or ".jpeg" for JPEGs; with ".bmp" for bitmap files, or with ".pdf" for PDF files.
If you leave out the "path" bit, CmdTwain will use the current directory. (That can usually be set in a shortcut - if you are using it that way. If you are using CmdTwain from inside another program, it will use whatever that program is using as the current directory).
CmdTwain -f Parameter File Mode
There is only one parameter after the "-f" part of the command line. This is:
paramfile. This is the name of a text file which contains a list of the Command Line Mode settings. There is one parameter to a line. Each line is labelled and each label and value are separated by a colon (:). It is easier to see than describe. It looks like:
Proc   : DocScan
Version: 1
Init   : (ScannerSettings described above)
OutFmt : (OutFmt described above)
OutFile: ([path\]file described above)
The colons can be lined up (as shown) but don't have to be.
You don't need to use quotes anywhere in the file, even if the ScannerSettings are blank and even if path or file contains spaces.
You can list the lines in any order.
This might be useful if you do some standard document scan types. In such cases you can create parameter files for each standard type and just reference the appropriate parameter file. I like to think of it as a set process where you are always going to do something the same way every time. Make sure you copy or move the scan file afterwards (or the next time you run the set process you'll overwrite it).
CmdLine Legacy Mode
Legacy mode is exactly the same as the way earlier versions of CmdTwain worked. The idea is that you can just drop the new version of CmdTwain in, and have it work.
There is some information on legacy mode in the reference material below.
Some Hints
The "CmdTwain /Source" legacy command allowed selecting a document scanner. That feature is still available in this version.
The Command Line Mode also allows you to use "@file.txt" for any of the parameters. That will cause CmdTwain to read the content of file.txt and use that, for the parameter. Embedded new line characters are converted internally to spaces so, if you prefer, you can write a series of scannersettings as a series of lines. e.g.
C:\> type map.txt
PAPER A3
DPI 300
COLOR
BR 200.0
C:\> CmdTwain -c @map.txt 75 scan.jpg
or
C:\> type docs.txt
IN WH 8.5 11.0
DPI 200
GRAY
C:\> CmdTwain -c @docs.txt 50 letter.jpeg
One of the benefits of this might be to define a scan style in a file and use that in all of your programs (for those of you writing programs that use CmdTwain). If you later choose to change the style, you can change the file and everywhere you use CmdTwain will now use the new settings. You wouldn't need to change your program at all.
Use in a Program
To use CmdTwain from one of your own programs (or Excel / Word / Access) the process is simple:
Pick a filename for your scan.
Choose your settings (eg COLOR, DPI 300, JPG75).
Run
"C:\Program Files (x86)\GssEziSoft\CmdTwain\CmdTwain.exe"
with your settings and filename.
Some examples follow.
In a Batch File
[path\]CmdTwain -c "A5 300 COLOR" BMP c:\users\(name)\desktop\scan.bmpIn VBA (eg in Excel / Word / Access)
prog  = "[path\]CmdTwain.exe"
init  = """A4 DPI 150 BW"""
adir  = "c:\users\(name)\documents"
afile = "scan.bmp"
Shell prog & " -c " & init & " BMP " & adir & "\" & afile, vbMinimizedNoFocus
In VB Script
prog  = """" & "[path\]CmdTwain.exe" & """"
init  = """" & "A4 DPI 150 BW" & """"
adir  = """" & "c:\users\(name)\documents" & """"
afile = """" & "scan.jpg" & """"
Set SH = WScript.CreateObject("WScript.Shell")
SH.Run prog & " -c " & init & " 100 " & adir & "\" & afile
In a Win32 C Program - Using System()
char cmd[512];
prog  = "[path\\]CmdTwain.exe";
init  = "A4 DPI 150 BW"
adir  = "c:\users\(name)\documents"
afile = "scan.pdf"
sprintf(cmd,"\"%s\" -c \"%s\" PDF \"%s\\%s\"",
    prog,init,adir,afile);
system(cmd);
NOTE. With most compilers, system() will run the program in a console-mode window. This pops up a black box which distracts from your program. This is a simple way to get started but you'll probably want to migrate to the next approach below.
In a Win32 C Program - Using Exec()
SHELLEXECUTEINFO ShExecInfo = {0};
TCHAR *cmd, *args;
DWORD exitCode;

cmd  = _T("[path\\]CmdTwain.exe");
args = _T("-c LETTER 75 c:\\temp\\scan.jpg");

ShExecInfo.cbSize = sizeof(SHELLEXECUTEINFO);
ShExecInfo.fMask  = SEE_MASK_NOCLOSEPROCESS;
ShExecInfo.hwnd   = NULL;
ShExecInfo.lpVerb = NULL;
ShExecInfo.lpFile = cmd;
ShExecInfo.lpParameters = args;
ShExecInfo.lpDirectory  = NULL;
ShExecInfo.nShow    = 0; // or SW_SHOW etc;
ShExecInfo.hInstApp = NULL;
ShellExecuteEx(&ShExecInfo);
WaitForSingleObject(ShExecInfo.hProcess,INFINITE);
if (GetExitCodeProcess(ShExecInfo.hProcess,&exitCode))
    return (int) exitCode;
return -1;
The fragments shown are examples only and there are many ways to achieve the same end. If you have a different preferred method or coding style, don't take the above as "you have to do it this way".
Some people have submitted examples of entire programs that use CmdTwain. These can provide context but bear in mind install paths and command line options have varied over the years. If you haven't noticed them already, they are at articles showing cmdtwain examples.
License
Contact
Website
The website is www.gssezisoft.com
You can email me via the website contact page.
Donations
This software is completely free. You do not have to pay anything at all for it.
If it is useful to you and if you want to contribute to more software like it, there is an option on the contact page to allow you to donate some money to the author of the software.
Reference
Command Line
The command line looks like:
- cmdtwain [-q] -c init outfmt [path]file
- cmdtwain [-q] -f paramfile
- cmdtwain [-q] legacymode
- cmdtwain [-q] /source
- cmdtwain -?
- cmdtwain -help
- cmdtwain -ver
Init
The options you can include in the init parameter are:
A4. Set the scan size to match A4 paper.
LETTER. Set the scan size to match US LETTER sized paper.
LEGAL. Set the scan size to match US LEGAL sized paper.
A3. Set the scan size to match A3 paper.
200. Scan at 200 dots per inch.
300. Scan at 300 dots per inch.
COLOR. Scan in color.
DPI number. Scan at number dots per inch.
PAPER size. Choose a standard scan size. size can be A4, LETTER, LEGAL, A3, A5, A6, B3, B4, B5, B6, C4, C5 or C6. Not all scanners support all sizes.
RGB. Scan in color.
GRAY. Scan with shades of gray.
BW. Scan in black and white.
IN. Use inches for WH and XYWH.
CM. Use centimeters for WH and XYWH. There are exactly 2.54 cm in one inch.
PX. Use pixels for WH and XYWH.
TW. Use twips for WH and XYWH. A twip is a 20th of a point and a point is 1/72 of an inch. This makes 1440 twips equivalent to one inch.
WH width height. Set the scan size to width and height units. The units may be inches, centimeters, pixels or twips (see IN, CM, PX, TW). The default is inches.
XYWH left top width height. Scan part of a page. This indents and "down-dents" by left and top then scans a size of width and height. All measurements are in the units specified by the IN, CM, PX or TW option. The default is inches.
BR number. Set the brightness during the scan. number can be anything between -1000 and 1000. 0 is normal.
CO number. Set the contrast during the scan. number can be anything between -1000 and 1000. 0 is normal.
ADF number. Select the Automatic Document Feeder or not. Using 1 for number turns it on. 0 turns it off.
DPX number. Turn on duplexing or not. Duplex involves scanning both sides of a page. Use 1 to turn duplex on (scan both sides) or 0 to turn it off (only scan one side of each page).
AF number. Turn on autofeeding or not. Autofeed causes the document feeder to load the next page for scanning. 1 turns it on. 0 turns it off. Autofeed doesn't work unless you specified ADF 1 before (somewhere to the left of) AF n.
AS number. Turn autoscanning on or off. 1 turns it on. 0 turns it off. Autoscan implies (and turns on) Autofeed. After each page is scanned, the next one is loaded AND scanned. With some scanners, the pages get saved in the scanner's internal memory so they are immediately available when CmdTwain asks for a page. In practice, you can see a number of pages processed rapidly by the scanner then, as its internal memory fills up, it waits while some pages are processed by CmdTwain and then scans another set of pages.
NOTE. As AS n implies AF n, you also need ADF 1 before AS n.GAMMA number. Gamma is a specialised setting that some users need to adjust. In practice, it affects midtones. A typical value is about 2.2 but this can be increased or decreased slightly (I have seen values between 1.0 and 3.0 used). Adjusting the gamma setting can improve the readabilty of some scans. Whilst there are lots of tools for improving pictures or scans after they were produced, some scanners let you adjust gamma settings during the scan. If you need access to this setting, it is available from CmdTwain. The default is to use whatever the scanner designer considered optimum.
AUTOBR number. AutoBrightness. Use 1 for on or 0 for off.
BPP number. Bits per pixel. Typically 1, 8 or 24.
FILM number. ICAP_LIGHTPATH setting, 0x111E. 0 is reflective (a page or a photo). 1 is transmissive (film or xray).
NEG number. ICAP_FILMTYPE setting, 0x115F. This only applies if you've already selected FILM 1. Use 0 to scan a positive image such a frame from a movie film or a projector slide. Use 1 for a negative such as from a roll of camera film.
Legacy Mode
Legacy mode used a series of options, each starting with a slash ("/"), on the command line. These are:
/SOURCE. Show a list of available scanner devices and allow the user to choose one.
/CONFIG. Ignored. This was used in earlier versions to send commands to a scanner and see what the result was. It was useful for testing scanners but isn't of any benefit when using one.
/EOF. Ignored. This was useful when CmdTwain only scanned a single page. It was intended to check if any pages remain in the document feeder.
/SCAN. Ignored. This was the default action anyway. It was useful when the /CONFIG option was present as it allowed sending commands, checking responses, and then scanning also.
/DPI number. Set the number of dots per inch in the scan. This is still available but it is slightly easier to use "DPI number" in the cmdtwain -c init parameter, or just use a shortcut like "200". Scanners only support certain DPI values (so unusual numbers like 1234 are unlikely to work).
/G key. Ignored. This was used to "Get" a configuration value.
/S key value. Still accepted. This "Set" a configuration value. Both key and value are copied into what would be the cmdtwain -c init parameter. Keys had names such as "CO" for contrast. These are now directly supported within init. The early experimental versions allowed key names like "settingNumber,settingType". You can still access any setting but, if you need a specialised one, you'll have to give it a name and add it to scan2bmps.ini.
/PAPER size. Set the paper size. Both "/PAPER" and the specified size are copied into what would be the cmdtwain -c init parameter. CmdTwain treats this as if it were "PAPER" and size. Typical sizes are: A4, LETTER, LEGAL. You can use any of the sizes that CmdTwain accepts.
/RGB. Scan in color. Still supported. Same as "RGB" in the cmdtwain -c init parameter.
/GRAY. Scan in shades of gray. Still supported. Same as "GRAY" in the cmdtwain -c init parameter.
/BW. Scan in black and white. Still supported. Same as "BW" in the cmdtwain -c init parameter.
/IN. Inches. Still supported. Same as "IN" in the cmdtwain -c init parameter.
/CM. Centimeters. Still supported. Same as "CM" in the cmdtwain -c init parameter.
/PX. Pixels. The units in subsequent WH and XYWH commands are in pixels rather than a unit of length (IN or CM). Still supported.
/TW. Twips. The units in subsequent WH and XYWH commands are in twips. A twip is 1/1440 of an inch. Whilst probably rarely used, the TWAIN standard includes this as an option and, if your scanner accepts it, you can use it. This is still supported.
/WH width height. Set width and height. Some scanners don't support paper sizes. If you have to, you can tell it to scan a specific size (see also /IN, /CM, /PX and /TW). This is still supported. Same as "WH width height" in the cmdtwain -c init parameter.
/XYWH left top width height. Set a scan location. This allows you to scan part of a page. Still supported. Same as "XYWH left top width height" in the cmdtwain -c init parameter.
/O outdir. Still supported. Same as cmdtwain -c ... [path] value.
/8. Still supported. Caused JPGs to be written as 8 bits per pixel. Same as cmdtwain -c ... outfmt of "75.8".
/BMP. Bitmap. Still supported. Same as cmdtwain -c ... outfmt of "BMP".
/JPG. JPEG. Still supported. Same as cmdtwain -c ... outfmt of "75".
/JPG25. JPEG low quality. Still supported. Same as cmdtwain -c ... outfmt of "25".
/JPG50. JPEG medium quality. Still supported. Same as cmdtwain -c ... outfmt of "50".
/JPG75. JPEG normal quality. Still supported. Same as cmdtwain -c ... outfmt of "75".
/JPG100. JPEG high quality. Still supported. Same as cmdtwain -c ... outfmt of "100".
Programs
CmdTwain comes with a number of programs that are used for specialised parts of the overall functionality. These are:
CmdTwain.exe. This provides the interface described here and coordinates the other parts.
Scan2bmps.exe. This does the actual document scanning. It creates one or more bmp files, one per page. It doesn't understand any other file format. It doesn't know how to compress images. It doesn't know how to assemble them into a combined document such as a PDF. It just scans and saves.
Bmp2jpg.exe. This converts bmp files to jpegs.
cjpeg.exe. This is a tool that can create old-fashioned, 8-bit JPEGs.
Jpg2pdf.exe. This converts a set of jpegs to a single PDF document.
INI Files
CmdTwain.exe and Scan2bmps.exe both come with INI files. These allow you to tailor their behaviour, if necessary, to better suit your needs.
CmdTwain.ini focuses on "workflow": what gets done by what program and where things go from there. Whilst most people just use CmdTwain as is, if you need to add a custom program directly into the internal process this is possible by changing the INI file.
Scan2bmps.ini is more concerned about scanner features and settings. All of the cmdtwain -c init values get processed within this INI file. If you need access to a specialized bit of functionality that your scanner supports, it can usually be added to CmdTwain by adding information into Scan2Bmps.ini.
Making Changes. The INI files exist in three places:
the relevant "Program Files" directory (.../GssEziSoft/CmdTwain/), and within %AppData% as
GssEziSoft/CmdTwain/CmdTwain.ver.ini and
GssEziSoft/Scan2bmps/Scan2bmps.ver.ini.
A long time ago, we used to be able to edit program initialization files that were stored with their programs. As a result, programs came with INI files and got stored in "Program Files". However, much of that changed and we now have an %AppData% directory. You cannot edit the INI files saved in the "Program Files" tree. Those ones are the "out-of-the-box" masters.
Only edit the INI files in %AppData%.
If you do make changes, installing a new version of CmdTwain won't automatically carry your changes forward. Sorry. I can't make the software smart enough to understand what you were doing and have it do the same in the new version. In most cases it will probably be safe to copy the changed bits into the new INI; but I'd rather you got to check it instead of me just assuming all will be well.
The version number is included in the name of the INI file in %AppData% to ensure I don't just overwrite any changes you make.
Reinstalling a version will not overwrite an existing %AppData% INI file.